When the Linux Shell in Windows was first released, I used it and didn’t quite like it. Fast forward a year later, I heard it is a lot better now (also the fact that my familiarity with terminal commands improved helped) so I decided to give it another try. It is a really fun experience so far. In case you haven’t install the Windows Subsystem for Linux (WSL), follow this step-by-step guide by Microsoft to get started. Then, install Hyper for Windows from here. If you didn’t already, you will also need node.js for the package management for plugins of Hyper.
Opening the config file #
At the Hyper window, press Ctrl + ,. It should open the config file “.hyper.js” with your default text editor. In case it throws an error, it is probably because Windows is trying to execute the js file instead of opening it for editing. You have 2 ways to work around this.
- (Not recommended) If you have an editor that can be opened through Powershell, then you can go ahead and do
atom .hyper.js(or whatever text editor yours is). - (Recommended) Navigate to the user folder with your File Explorer (“C:\Users%YourUserName%\”). Right click “.hyper.js”, select “Properties”, change the “Opens with: ” to a text editor like ‘Notepad’ etc.
After this, you should be able to pull up the config file easily with either pressing Ctrl + , or through the Hamburger Menu into ‘Edit’ → ‘Preferences’.
Pointing Hyper to the Linux Shell #
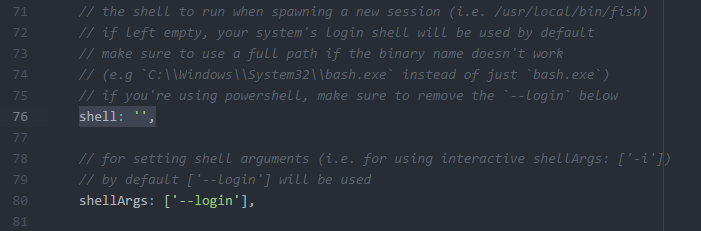
From the config file, look for the shell: '', option as seen from the screenshot above, change it to shell: 'C:\\Windows\\System32\\bash.exe\', as suggested by the comment. In my personal experience so far, neither keeping nor removing ‘shellArgs’ make any changes to the bash shell. While you are at it, feel free to add any kind of plugins you want to it. Personally, I added 'hyperterm-cobalt2-theme' because I like the theme.
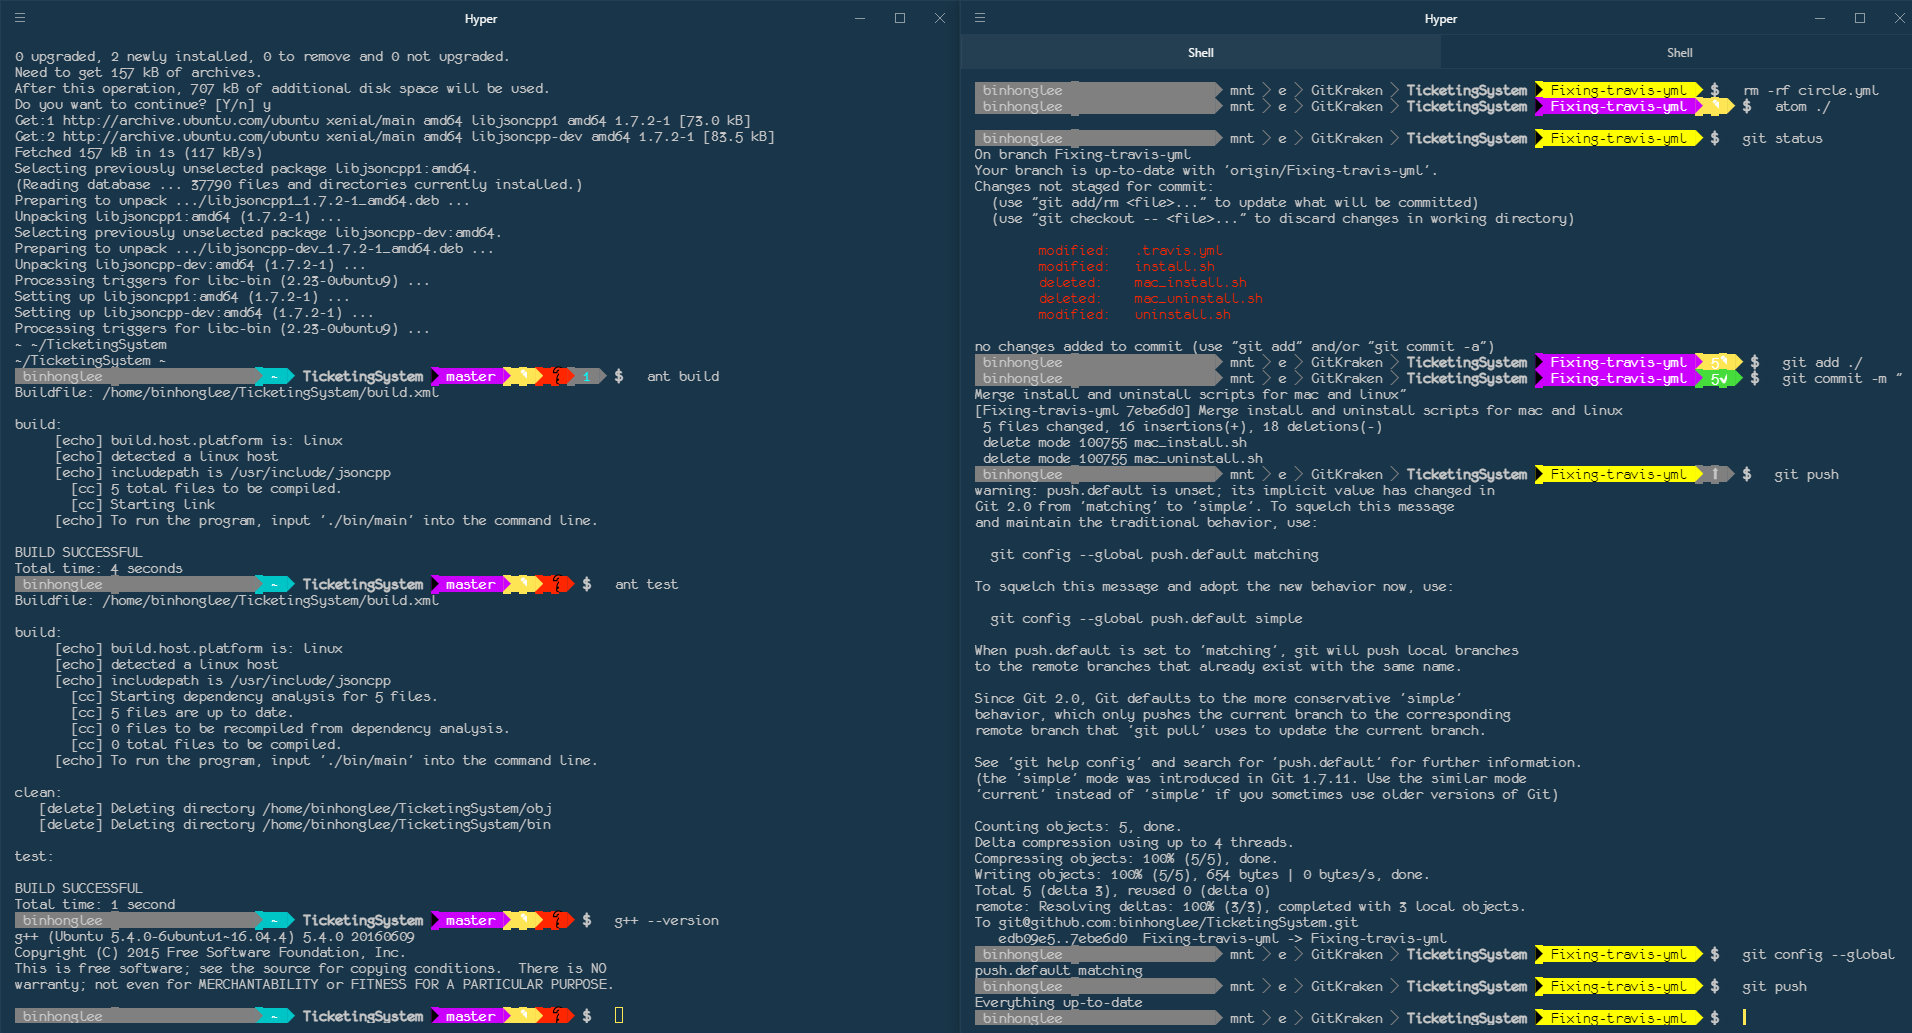
You should now be able to use Hyper just like a normal Linux Shell.
General development environment and tools #
Since you will most likely be using this for development, you should definitely run the following commands to set yourself up.
|
|
Among all of the above, installation of python-pip is crucial to the next step in installing Powerline for Hyper (or more like bash).
Installing Powerline #
This section is referenced from SETTING UP POWERLINE SHELL ON WINDOWS SUBSYSTEM FOR LINUX #
Run the following to install Powerline.
|
|
WARNING: you should not at anytime remove powerline-shell folder (or attempt to) without reverting the following changes that you will make to the .bashrc.
|
|
Feel free to use any other command line editor if you prefer (I use vim personally). Add the following lines to the file.
|
|
*Note: If you happen use nano (like the given example), do note that Ctrl+X will not exit the program. You can do F2 instead.
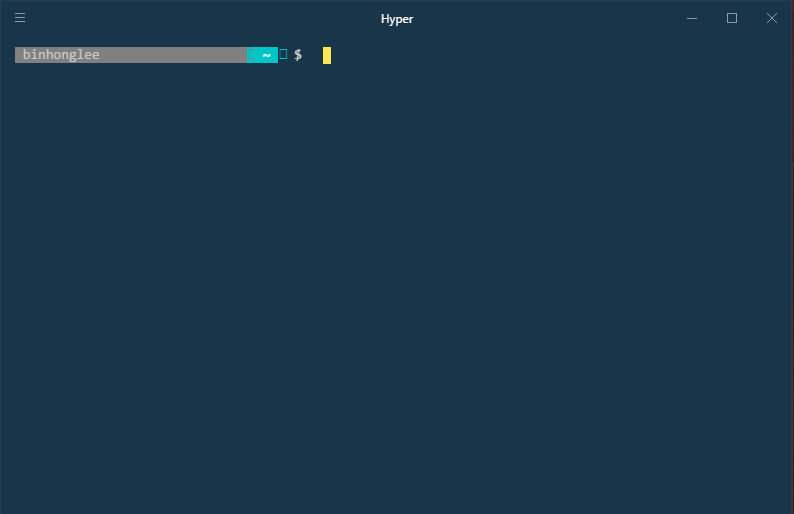
Save and restart Hyper (or refresh) and it should look something like this. Realize the missing characters which are supposed to be the arrows.
Fonts for Powerline #
For the character to show, you will need Powerline fonts installed and set it in your config file Ctrl + , for Hyper.
Go to https://github.com/powerline/fonts, pick a font you like (I use monofur) or clone the repo and install all the fonts. Remember to install it as Windows, meaning you will be running the ps1 file (PowerShell) instead of the sh file. If it throws an error saying something along the lines of “running scripts is disabled”, follow the instructions here to enable it and run it again.
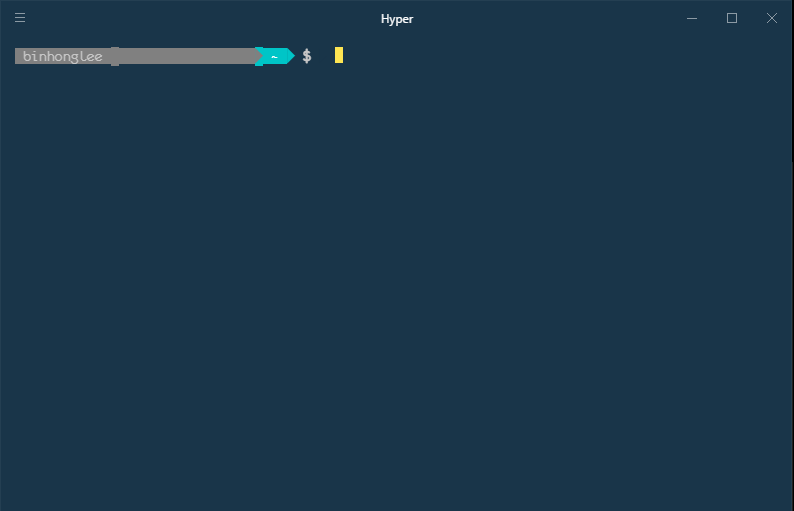
When you are done with the installation, remember to change the font through the config file, then reload Hyper. At this point, it should look something like the following screenshot.
(Optional) Installing npm #
This section is referenced from Installing nvm, nodejs and npm on Ubuntu by Randika Rathugamage #
The obvious way to do this is by installing it through the default package manager. However, the npm installed through apt-get is 3.5.2 version without node. I personally prefer installing it with nvm starting by cloning the nvm repository and adding it to .bashrc.
|
|
From here, you can either reset Hyper or do a source .bashrc to get nvm working for you. After that, you can do nvm ls-remote to look at all the versions available before deciding which to install or you can just do nvm install node and call it a day.
(Optional) Configuring aliases #
It is important to note that the Linux file system is separated from the Windows file system (located in C:/User/your-name/AppData/Local/lxss). Windows went as far as to not show the folder in File Explorer even if you select to show hidden files just so you don’t mess with it. In one scenario where I made a change to one of the files in there from File Explorer through my text editor in Windows, the WSL no longer recognizes the existence of such file in the directory immediately.* This is why you should keep all your files in your Windows side of file system and access them through something like cd /mnt/e/git/. Retyping the file path over and over again can be annoying so instead, you can set an alias by adding the command below but changing the location to the directory where you store your development files.
*Workaround: I ended up creating a new file with vim in bash and copy pasting the entire existing file from Windows. I also renamed the files beforehand to prevent file conflict.
|
|
From here on out, you can just do gitfiles in Hyper (or bash) and you will go directly to your development folder.
Reset #
This section is referenced from How to remove/reset Windows Subsystem for Linux on Windows Insider Build 14316 #
If at any point, you seems to have screwed up your Linux subsystem, you can always reset it by going to your command prompt cmd.exe with admin privilege (Run as administrator) and input the following commands to reset the Linux subsystem.
|
|
Other useful links #
- Installing Oracle Java for development
- First time Git setup
- Setting up ssh access for GitHub (Creating key, Adding key to account)
- Making Terminal Great Again (My inspiration to write this)
Afterthoughts #
Initially, I did this with zsh (since I personally uses Powerlevel9k on my Mac and I love it) but zsh doesn’t seems to play well with Hyper (specifically with the plugins) causing a lot of weird configuration behaviors. Even without Hyper, the alignments for Powerlevel9k specifically goes way off causing the input line to be on the next line instead. I speculate this is due to zsh not being built with Windows in mind and does not have such compatibility.
This article was originally published on my personal Medium publication.